 文件上传与下载
在上网的时候我们常常遇到文件上传的情况,例如上传头像、上传资料等;当然除了上传,遇见下载的情况也很多,接下来看看我们 servlet 中怎么实现文件的上传和下载。
# 文件上传
文件上传涉及到前台页面的编写和后台服务器端代码的编写,前台发送文件,后台接收并保存文件,这才是一个完整的文件上传。
# 前台页面
在做文件上传的时候,会有一个上传文件的界面,首先我们需要一个表单,并且表单的请求方式为POST;其次我们的 form 表单的 enctype 必须设为"multipart/form-data",即enctype="multipart/form-data",意思是设置表单的类型为文件上传表单。默认情况下这个表单类型是 "application/x-www-form-urlencoded", 不能用于文件上传。只有使用了multipart/form-data 才能完整地传递文件数据。
<!--
文件上传表单
1. 表单提交类型 method="post"
2. 表单类型 enctype="multipart/form-data"
3. 表单元素类型 文件域设置name属性值
-->
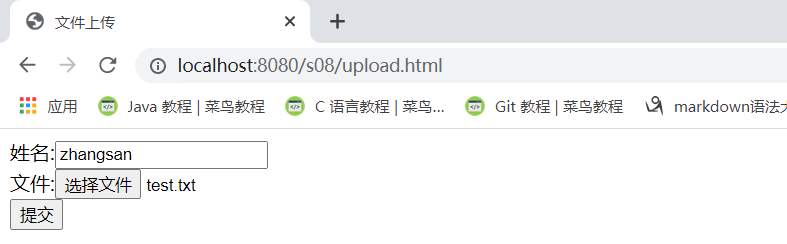
<form method="post" action="uploadServlet" enctype="multipart/form-data">
姓名:<input type="text" name="uname" > <br>
文件:<input type="file" name="myfile" > <br>
<button type="submit">提交</button>
</form>
2
3
4
5
6
7
8
9
10
11
Click to view the code writen by the author
<!DOCTYPE html>
<html lang="en">
<head>
    <meta charset="UTF-8">
    <title>文件上传</title>
</head>
<body>
<!--
    文件上传
        1.准备表单
        2.设置表单的提交类型为POST请求 method="post"
        3.设置表单类型为文件上传表单 enctype="multipart/form-data"
        4.设置文件提交的地址
        5.准备表单元素
            1.普通的表单项 type="text"
            2.文件项      type="file"
        6.设置表单元素name属性值(表单提交一定要设置表单元素的name属性值,否则后台无法接受数据!)
        -->
    <form method="post" enctype="multipart/form-data" action="UploadServlet">
        姓名:<input type="text" name="uname">  <br>
        文件:<input type="file" name="myfile"> <br>
        <!--button默认的类型是提交类型 type="submit"-->
        <button>提交</button>
    </form>
</body>
</html>
2
3
4
5
6
7
8
9
10
11
12
13
14
15
16
17
18
19
20
21
22
23
24
25
26
# 后台实现
使用注解 **@MultipartConfig **将一个 Servlet 标识为支持文件上传。 Servlet 将 multipart/form-data的 POST 请求封装成 Part,通过 Part 对上传的文件进行操作。
@WebServlet("/uploadServlet")
@MultipartConfig // 如果是文件上传表单,一定要加这个注解
public class UploadServlet extends HttpServlet {
	@Override
	protected void service(HttpServletRequest request, HttpServletResponse response) throws ServletException, IOException {
		// 设置请求的编码格式
		request.setCharacterEncoding("UTF-8");
		// 获取普通表单项 (文本框)
		String uname = request.getParameter("uname"); // "uname"代表的是文本框的name属性值
		// 通过 getPart(name) 方法获取Part对象 (name代表的是页面中file文件域的name属性值)
		Part part = request.getPart("myfile");
    	// 通过Part对象,获取上传的文件名
		String fileName = part.getSubmittedFileName();
		// 获取上传文件需要存放的路径 (得到项目存放的真实路径)
		String realPath = request.getServletContext().getRealPath("/");
		// 将文件上传到指定位置
		part.write(realPath + fileName);
	}
}
2
3
4
5
6
7
8
9
10
11
12
13
14
15
16
17
18
19
Click to view the code writen by the author
/**
* @author scholar
* @version 1.0
* @date 2023/1/14 16:16
*
*/
@WebServlet("/UploadServlet")
@MultipartConfig
public class UploadServlet extends HttpServlet {
@Override
protected void service(HttpServletRequest req, HttpServletResponse resp) throws ServletException, IOException {
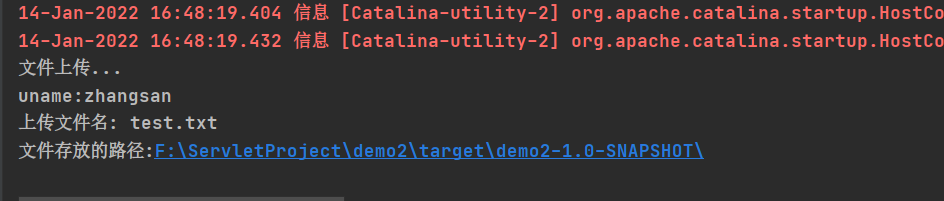
System.out.println("文件上传...");
//设置请求的编码格式
req.setCharacterEncoding("UTF-8");
//获取普通表单页(获取参数)
String uname = req.getParameter("uname");//表单中表单元素的name属性值
System.out.println("uname:"+uname);
//获取Part对象 (Servlet将multipart/form-data的 POST 请求封装成 Part)
Part part = req.getPart("myfile");//表单中file文件域的name属性值
//通过Part对象得到上传的文件名
String fileName = part.getSubmittedFileName();
System.out.println("上传文件名: "+fileName);
//得到文件存放的路径
String filePath = req.getServletContext().getRealPath("/");
System.out.println("文件存放的路径:"+filePath);
//上传文件到指定目录
part.write(filePath+"/"+fileName);
}
}
2
3
4
5
6
7
8
9
10
11
12
13
14
15
16
17
18
19
20
21
22
23
24
25
26
27
28
29
30
31
32
33
34
35
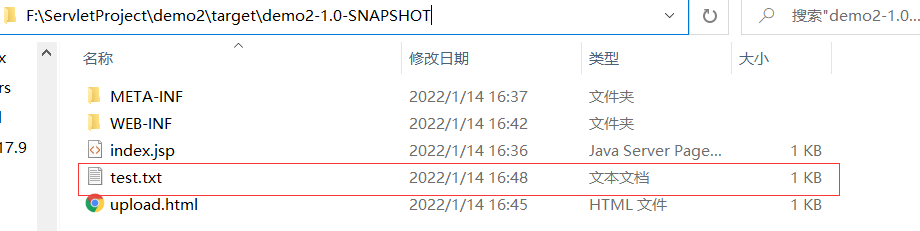
- 访问URL
- 控制台
- 查看文件是否存在
# 文件下载
文件下载,即将服务器上的资源下载(拷贝)到本地,我们可以通过两种方式下载。第一种是通过超链接本身的特性来下载;第二种是通过代码下载。
# 超链接下载
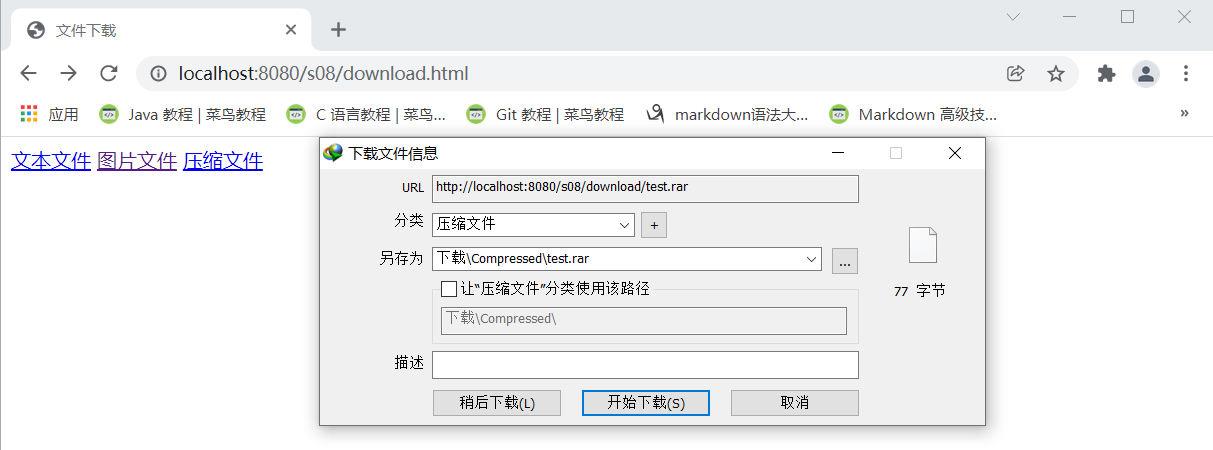
当我们在 HTML 或 JSP 页面中使用a标签时,原意是希望能够进行跳转,但当超链接遇到浏览器不识别的资源时会自动下载;当遇见浏览器能够直接显示的资源,浏览器就会默认显示出来,比如 txt、png、jpg 等。当然我们也可以通过download 属性规定浏览器进行下载。但有些浏览器并不支持。
- 默认下载
<!-- 当超链接遇到浏览器不识别的资源时,会自动下载 -->
<a href="test.zip">超链接下载</a>
2
- 指定 download 属性下载
<!-- 当超链接遇到浏览器识别的资源时,默认不会下载。通过download属性可进行下载 -->
<a href="test.txt" download>超链接下载</a>
2
download 属性可以不写任何信息,会自动使用默认文件名。如果设置了download属性的值,则使用设置的值做为文件名。当用户打开浏览器点击链接的时候就会直接下载文件。
Click to view the code writen by the author
<!--download.html文件-->
<!DOCTYPE html>
<html lang="en">
<head>
<meta charset="UTF-8">
<title>文件下载</title>
</head>
<body>
<!--
超链接下载
当使用超链接(a标签)时,如果遇到浏览器能够识别的资源,则会显示内容;
如果遇到浏览器不能识别的资源,则会进行下载
download 属性
download 属性可以不写任何信息,会自动使用默认文件名。
如果设置了download属性的值,则使用设置的值做为文件名。
当用户打开浏览器点击链接的时候就会直接下载文件。-->
<!--浏览器能识别的资源-->
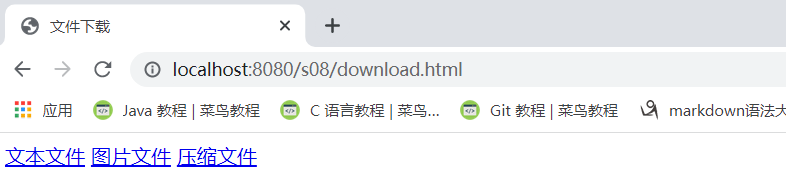
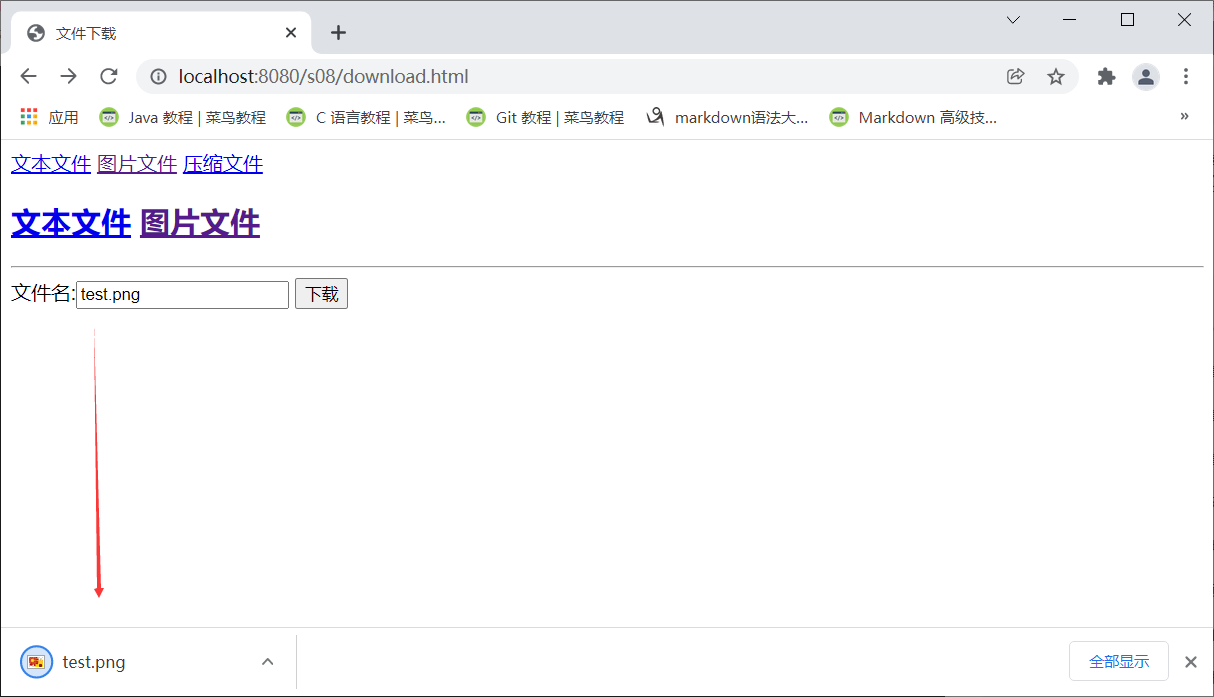
<a href="download/test.txt">文本文件</a>
<a href="download/test.png">图片文件</a>
<!--浏览器不能识别的资源-->
<a href="download/test.rar">压缩文件</a>
</body>
</html>
2
3
4
5
6
7
8
9
10
11
12
13
14
15
16
17
18
19
20
21
22
23
24
25
- 访问URL
- 点击压缩文件
- 设置download属性
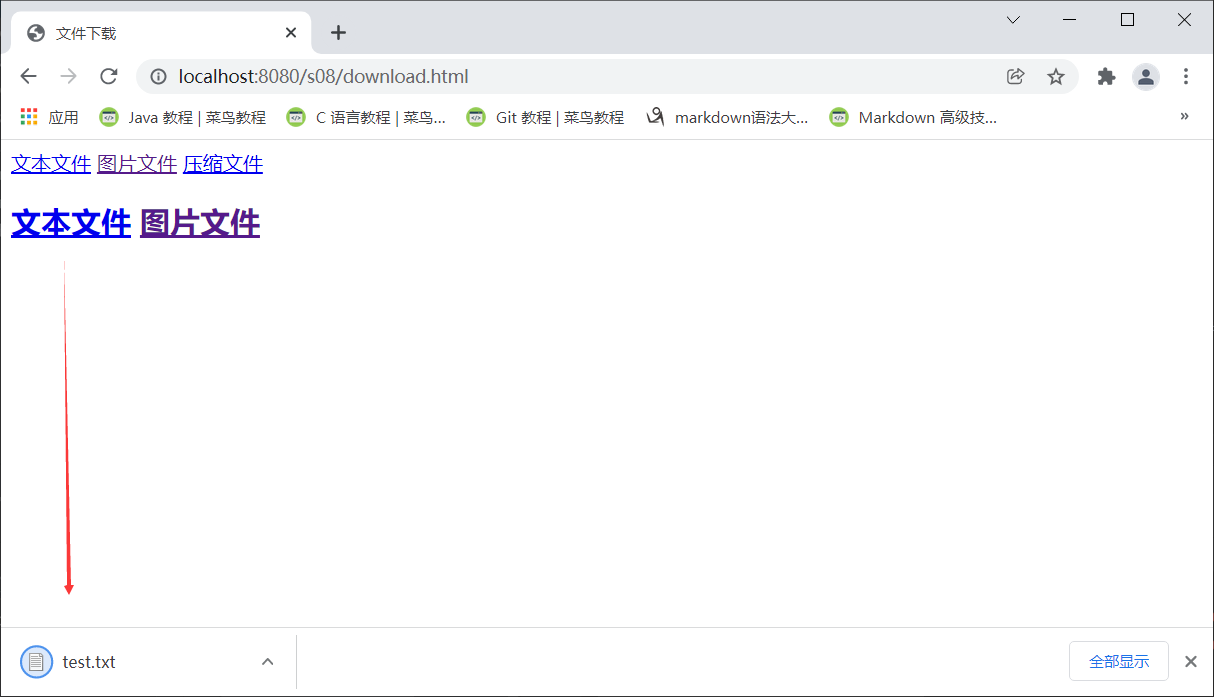
Click to view the code writen by the author
<!--向download.html中增加以下内容-->
<h2>
    <a href="download/test.txt" download>文本文件</a>
    <a href="download/test.png" download="桌面.png">图片文件</a>
</h2>
2
3
4
5
- 效果
# 后台实现下载
- 实现步骤
- 需要通过 response.setContentType 方法设置 Content-type 头字段的值, 为浏览器无法使用某 种方式或激活某个程序来处理的 MIME 类型,例 如 "application/octet-stream" 或 "application/x-msdownload" 等。
- 需要通过 response.setHeader 方法设置 Content-Disposition 头的值为 "attachment;filename=文件名"
- 读取下载文件,调用 response.getOutputStream 方法向客户端写入附件内容。
public class DownloadServlet extends HttpServlet {
	protected void service(HttpServletRequest request, HttpServletResponse response) throws ServletException, IOException {
		// 设置请求的编码
		request.setCharacterEncoding("UTF-8");
		// 获取文件下载路径
		String path = getServletContext().getRealPath("/");
		// 获取要下载的文件名
		String name = request.getParameter("fileName");
		// 通过路径得到file对象
		File file = new File(path + name);
		// 判断file对象是否存在,且是否是一个标准文件
		if (file.exists() && file.isFile()) {
			// 设置响应类型 (浏览器无法使用某种方式或激活某个程序来处理的类型)
			response.setContentType("application/x-msdownload");
			// 设置头信息
			response.setHeader("Content-Disposition", "attachment;filename=" +
name);
			// 得到输入流
			InputStream is = new FileInputStream(file);
			// 得到输出流
			ServletOutputStream os = response.getOutputStream();
			// 定义byte数组
			byte[] car = new byte[1024];
			// 定义长度
			int len = 0;
			// 循环 输出
			while ((len = is.read(car)) != -1) {
				os.write(car, 0, len);
			}
			// 关闭流 释放资源
			os.close();
			is.close();
		} else {
			System.out.println("文件不存在,下载失败!");
		}
	}
}
2
3
4
5
6
7
8
9
10
11
12
13
14
15
16
17
18
19
20
21
22
23
24
25
26
27
28
29
30
31
32
33
34
35
36
37
Click to view the code writen by the author
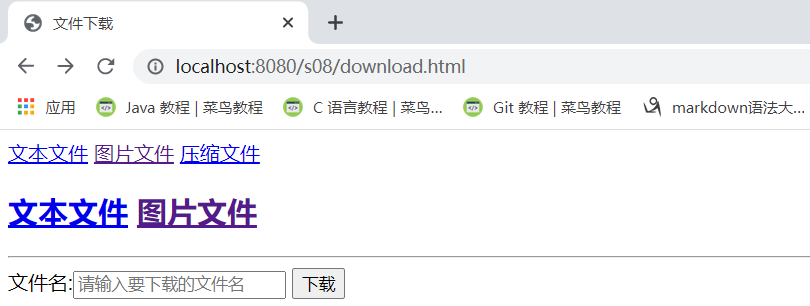
<!--向download.html中增加以下内容-->
<hr>
    <form action="downloadServlet">
        文件名:<input type="text" name="fileName" placeholder="请输入要下载的文件名">
        <button>下载</button>
    </form>
</hr>
2
3
4
5
6
7
/**
* @author scholar
* @version 1.0
* @date 2023/1/14 17:24
* 1. 需要通过 response.setContentType 方法设置 Content-type 头字段的值, 为浏览器无法使用某
* 种方式或激活某个程序来处理的 MIME 类型,例 如 "application/octet-stream" 或 "application/x-msdownload" 等。
* 2. 需要通过 response.setHeader 方法设置 Content-Disposition 头的值为 "attachment;filename=文件名"
* 3. 读取下载文件,调用 response.getOutputStream 方法向客户端写入附件内容。
*/
@WebServlet("/downloadServlet")
public class DownloadServlet extends HttpServlet {
@Override
protected void service(HttpServletRequest req, HttpServletResponse resp) throws ServletException, IOException {
System.out.println("文件下载...");
//设置请求的编码格式
req.setCharacterEncoding("UTF-8");
//获取参数(得到要下载的文件名)
String fileName = req.getParameter("fileName");
//参数的非空判断 trim():去除字符串前后空格
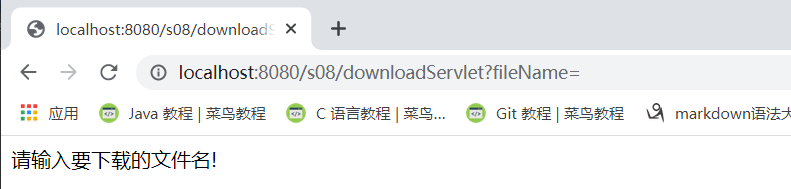
if(fileName==null || "".equals(fileName.trim())){
resp.setContentType("text/html;charset=UTF-8");
resp.getWriter().write("请输入要下载的文件名!");
resp.getWriter().close();
return;
}
//得到图片存放的路径
String path = req.getServletContext().getRealPath("/download/");
//通过路径的到file对象
File file = new File(path + fileName);
//判断文件是否存在
if(file.exists() && file.isFile()){
//设置相应类型(为浏览器无法使用某种方式或激活某个程序来处理的 MIME 类型)
resp.setContentType("application/x-msdownload");
//设置响应头
resp.setHeader("Content-Disposition","attachment;filename= "+fileName);
//得到输入流
FileInputStream in = new FileInputStream(file);
//得到字节输出流
ServletOutputStream out = resp.getOutputStream();
//定义一个byte数组
byte[] bytes = new byte[1024];
//定义长度
int len=0;
//循环输出
while ((len=in.read(bytes))!=-1){
//输出
out.write(bytes,0,len);
}
//关闭资源
out.close();
in.close();
}else {
resp.setContentType("text/html;charset=UTF-8");
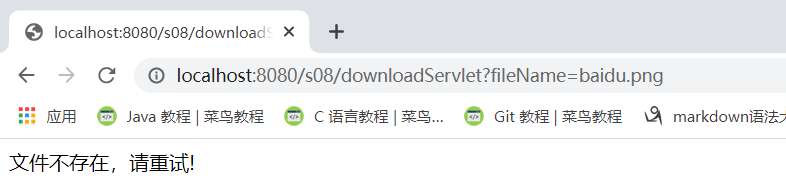
resp.getWriter().write("文件不存在,请重试!");
resp.getWriter().close();
}
}
}
2
3
4
5
6
7
8
9
10
11
12
13
14
15
16
17
18
19
20
21
22
23
24
25
26
27
28
29
30
31
32
33
34
35
36
37
38
39
40
41
42
43
44
45
46
47
48
49
50
51
52
53
54
55
56
57
58
59
60
61
62
63
64
65
66
67
- 访问URL
- 不输入任何点击下载
- 输入不存在的文件名,点击下载
- 存入存在的文件,点击下载
下载成功!